Wednesday, April 4, 2018

AAR: A German Counter Attack in the West, 1944

A Chain of Command Battle Report


Last weekend we played the attack and defend scenario using the excellent world war rules from Too Fat Lardies.

The scenario had a German panzer grenadier platoon trying to counter attack on the Western Front, ETO. The American infantry platoon defending had been in place for awhile so they had time to dig in before the German panzers arrived.

As the Germans were attacking they had more support, in this case an Adjutant, a Schwimmwagen, a 250 halftrack with a machinegun team and a Panzer IV tank.

The Americans had two entrechments, an extra bazooka team (apart from the one included in the platoon already) and an .50 cal Heavy machine gun.

Support  

The German Support


The American Support

The Table

We played on a 6x4' table. After the Patrol Phase both the Americans and the Germans had a strong precence close to the hamlet. We played the areas of trees and wheat fields as light cover if stationary, but counting as open ground if the troops were moving.


German Jump of Points in red, American in blue.
The Game

Pictures below, but first a short write up of the action.

It started off with a German squad advancing among the trees closing on the hamlet. Soon an American Squad deployed in the main building and opened fire on the Germans. After yet another German squad deployed amongst the trees the situation got from bad to worse for the Americans. They simply couldn't handle those four(!) MG42s but withdrew from the windows.

During that firefight a 250 halftrack arrived on the road, racing towards the hamlet. The Americans, dug in in the wheat field, made their presence known by first using a bazooka to stop the halftrack and then having a squad open fire, whiping the German recce squad out.

More German armour arrived and started shelling the dug in Americans with HE. As yet another  German squad arrived in the field and yet more entreched Americans appeared in center things got heated up as both sides took casualties and shock. The Americans were lucky to have very accurate bazooka teams on the field, hitting the Panzer IV over and over again, eventually making its crew abandon the tank. Also, the Americans benefited from having their Platoon Sergeant arrive on the scene when things were looking quite bleak, to restore order and direct fire.

The two German squads over at the hamlet wiped the lone American squad, it all ended in a handgrenade tossing close assault. They had trouble getting across the court yard though, as there was still a third American squad waiting for the right moment to strike.

In the end the German squad in the wheatfield broke and with that the German Force Morale. The Americans had at that time been balancing on a Force Morale of 5 for quite some time but were lucky with their rolls when bad things happened (and they did!).

A great game with lots of fun and some really cinematic moments.


The Germans advance on the hamlet

The German 250 halftrack arrive
Boom! The Americans reveal themselves
The Germans scramble out of their buring vehicle
only to be wiped out by American rifle fire
The German Panzer IV shoots HE at the dug in Americans in the distance
The American line holds

Sunday, February 4, 2018

Swedish Soldiers of the Napoleonic Wars (Part IV) - Modelling a Greatcoat for 28mm

Happy days ahead as Perry Miniatures are about to release Swedish miniatures for the Napoleonic era. They will do an excellent job of them I'm sure. So less need to convert your own Swedish miniatures, thankfully.

For an overview of the Swedish uniform of the Napoleonic era please have a look HERE.

I don't know if the Perry's Swedish range will cover soldiers in greatcoats though. Ever since before the days of Charles XII and the Carolean soldiers the Swedes used a simple cape in bad weather. It was not before 1806 a greatcoat called kapott was introduced. It had not only sleeves but also a falling collar that reached the elbows. It was in use for the rest of the Napoleonic War.

A m/1806 kapott from the Army Museum's collections.
This particular example is not full size and is
intended as a "blueprint" sent to the regiments.
A Knötel drawing illustrating the Swedish greatcoat or kapott.
Also note the "Mid War" uniforms.

As the Siege of Stralsund 1807 aswell as the war in Finland 1808-1809 both includes fighting in bad weather conditions, including snow in winter, one might want to include some soldiers wearing their greatcoat. Fortunately Perry Miniatures can help us yet again. For Swedish napoleonic infantry in greatcoats we have used ACW49 Early Federal Militia in shakos, overcoats and full kit, from the Perry American Civil War range.

We have used British Marine Heads from Brigade Games. These should recieve a special mention as they were great to use for converting Swedish line infantry for most of the war. You can for instance combine them with Perry Miniatures dismounted dragoon bodies to create the Early War (m/1802) uniform as Mikael at the Dalauppror did as seen HERE. But with Perry Miniatures soon releasing Swedish napoleonics the need for coverting your own miniatures will hopefully disapear all together eventually.


Below are some pictures that hopefully show the process of making a Swedish greatcoat using the miniatures above. I added a collar of greenstuff, together with the bag and the cupper bowl. Please note that for my example I cut and filed the lower legs on the ACW miniature to give the impression of gaiters.


Wednesday, August 30, 2017

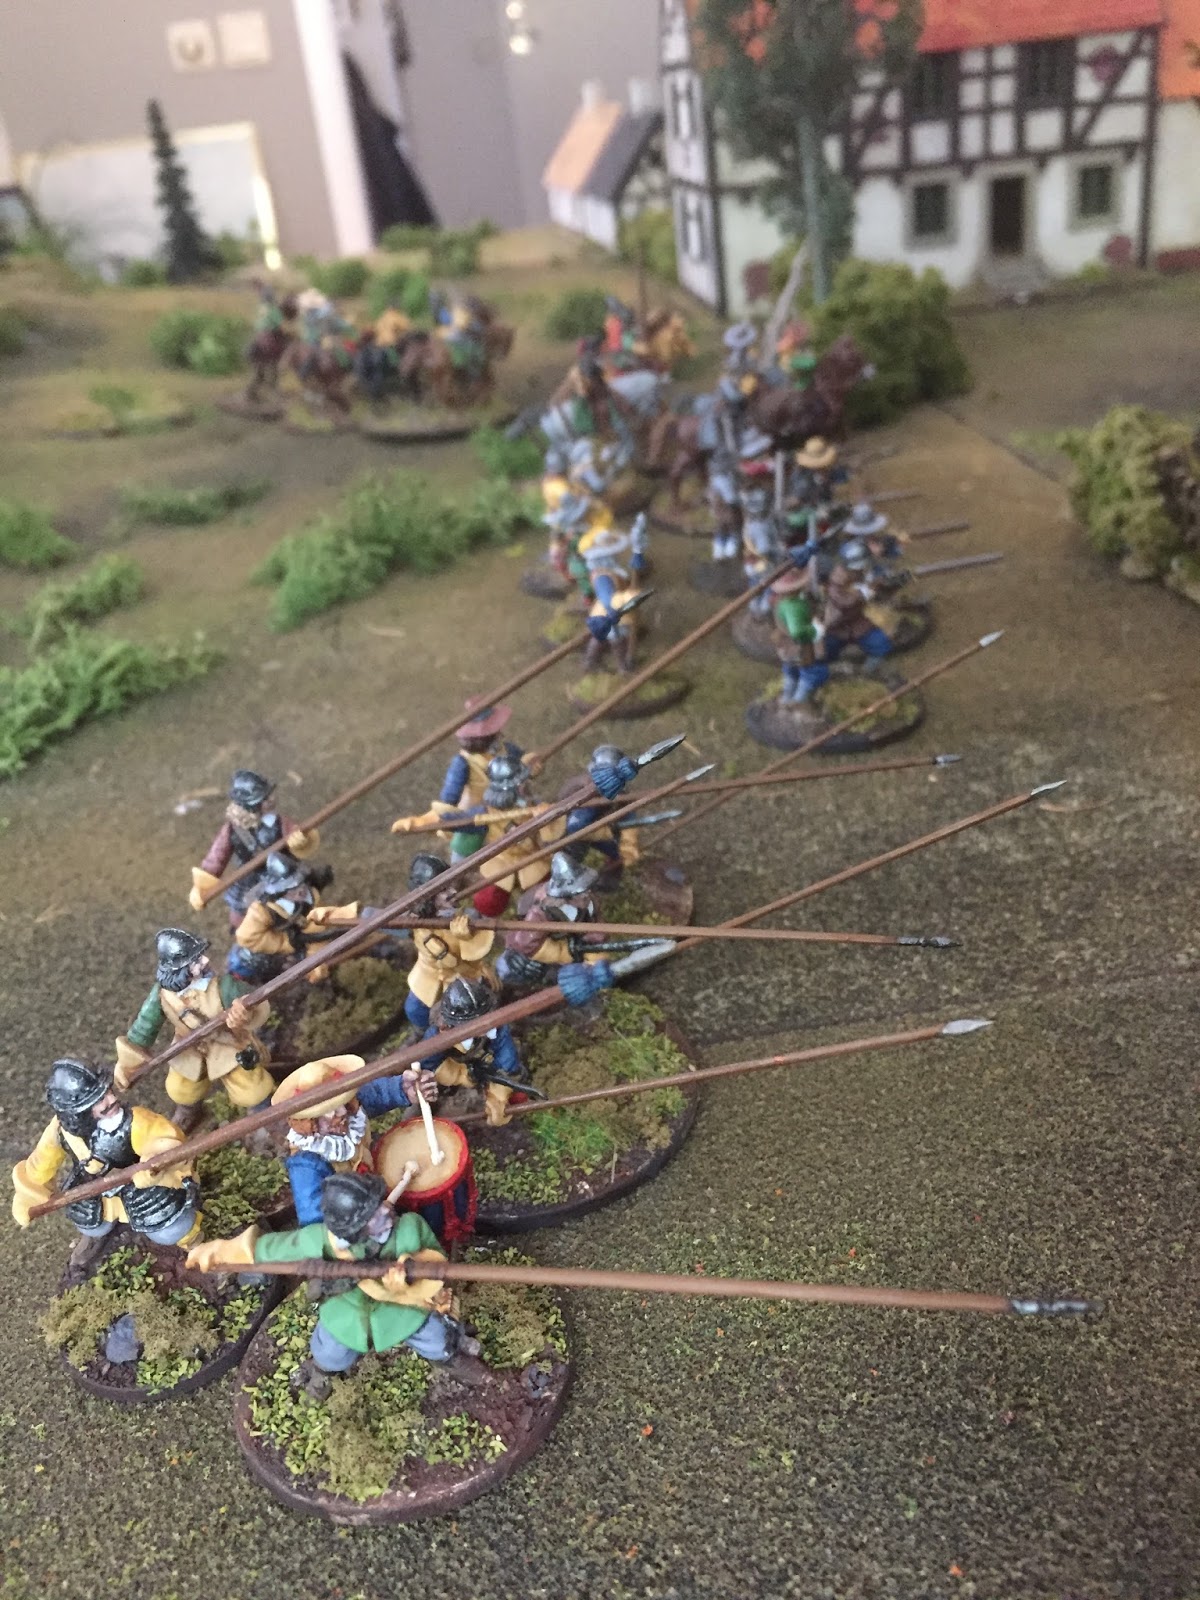
AAR: Rivalry at Rügenwald 1630 - a Thirty Years War skirmish in 28mm

A battle report using the Pikeman's Lament ruleset depicting a skirmish outside Rügenwald in 1630

Introduction

After a long summer and a quiet blog its time for an AAR from a while back.

We played a Thirty Years War game using the excellent Pikeman's Lament rules of Dan Mersey and Michael Leck.

During the Thirty Years War many Scotsmen served with the Swedish army. The war had been raging on the European continent for already more than a decade when Gustavus Adolphus in 1630 landed in Northern Germany with an army, initially to take control over the German cities on the northern German coastline. Reay's Regiment, a regiment under Scottish commander Donald Mackay, 1st Lord of Reay, joined the Swedish forces and was involved in taking the coastal cities of Stettin and Colberg.

Our game is set in between the taking of those two cities. During that time, in August 1630, six companies of Reay’s Regiment, was ordered to re-join the main body of the regiment at Stettin. En route, one of the boats foundered off the Pomeranian coast near Colberg, and nearly 200 men landed with only themselves, their ‘swords, pikes and some wet muskets’. The Scots surprised the town of Rügenwald and obtained fresh powder and ammunition. They held the town for nine weeks until Gustavus Adolphus sent Hepburn’s Scottish regiment to relieve them (for more information have a look here).

In our scenario an Imperial probing force is closing on Rügenwald and some men of the Reay's Regiment mount up to meet them. For this we used the Gå På-scenario from the Pikeman's Lament, a straightforward fight between two companies, with scores for routing or wiping out enemy groups.

The Opposing Forces

Scottish

6 Gallopers including Officer @ 4 pts
6 Gallopers @ 4 pts
6 Gallopers @ 4 pts
6 Gallopers @ 4 pts
12 Shot @ 4 pts
12 Shot @ 4 pts
12 Pike @ 4 pts

The Scotsmen from Reay's Regiment


Imperial

6 Trotters including Officer @ 4 pts
6 Trotters @ 4 pts
12 Shots @ 4 pts
12 Shots @ 4 pts
12 Shots @ 4 pts
12 Pike @ 4 pts
6 Dragoons @ 4 pts


The Imperial Attackers


The Game

The game begun with both sides advancing. It soon became clear that the Imperial side could find good defensive positions on their side, covering the open ground in the middle of the battlefield. Also, the Scottish infantry in the center had difficulties keeping up with its cavalry. It didn't help that the Scotsmen got a message from their commander back in Rügenwald calling a group of men from the field of battle (a Random Event: rolling a doubble '1' for Activation followed by a '6')! However, the same group of men came back just a turn later (rolling a dobble '6' for activation followed by a '6')! We laughed as the Scottish commander obviously couldn't make up his mind.

The Scottish cavalry heavy forces failed to get to grips with the Imperial forces and where instead steadily depleeted through Imperial musket fire. A group of Scottish Gallopers tried to turn the Imperial flank but failed to make true impact. When the Imperials, through yet another Random Event, got reinforcements on that very flank the fight was all but over.

Some poor Scottish cavalry deployment facing well placed Imperial infantry gave a hesitant Scottish advance and manouvering in the face of Imperial musketry. The end result being that the Scots of the Reay's Regiment had to retreat to Rügenwald, and wait for Gustav Adolphus to send troops to save the day.

The Scottish cavalry advances...

...as the infantry try to keep up in the field.

The Imperial line, with Trotters coming down the hill.

A close order group of Imperial pike - reinforced with Shot in good
positions -  making the Scottish cavalry hesitate.
With an overcrowded left flank met with fierce resistance
some of the Scottish cavalry try to find another way forward...

...but the Imperials pour fire into the Scottsmen trying to manouver in the field.


The Imperial line, well positioned.

A group of Swedish cavalry - having entered the field of battle
through the hamlet - arrive to try to turn the Imperial flank

"Our commander needs us elsewhere! Lets go!"
The Scottish pike are called off the field of battle.
Only to return a turn later. :-)

Swedish cavalry on the extreme left flank.


The Scottish cavalry finaly attacks...

...crushing into Imperial Shot.
A swirling cavarly clash in the center.

Having beaten back the Imperial Trotters at a very high cost, the
lone surviving horseman of the flanking Swedish Gallopers
is in turn attacked by Imperial reinforcements. Game over.


Sunday, April 2, 2017

AAR: A Soviet Urrah in Autumn 1944

A Chain of Command Battlereport in 28mm


Introduction

Time for another AAR of Chain of Command gaming, using the rules from Too Fat Lardies. This time we used a setting of late war Eastern Front. With a force of Fallschirmjager falling back from the Soviet advance but yet again putting up a fight, trying to stem the tide. 

We used the Delay Action scenario from the Chain of Command rulebook with a somewhat disorganised defender trying to halt the attacker. To win the Soviet attacker had to try and take and hold (until the end of a Turn) an objective deep in the Germans end of the table.  

It was the first time we used Soviets so we were keen on trying out an iconic (if not maybe not all  historical) all out assault with both tanks and infantry.

Opposing forces

The defending veteran Fallschirmsjager platoon were of elite status.
They were supported by a Sniper team.


The Soviet tankrider platoon were regulars. As attackers, and as the Fallschirmsjager were of higher rating, the Soviets had plenty of support: a pre-game barrage and not only one but two T34/85 tanks.

Table and deployment

We played down the length of a 6x4' table. After the patrol phase the Soviets had three Jump off points (marked in red) spread across the table, one of which was a bit forward on the left flank.

The German’s two Jump off points (marked in blue) were in good defensive positions on each side of the central road while the objective (marked in white) was in a deep central position. 

A 6x4' table.


The Game

True to form the Soviet heavy artillery opened up before the attack. With the pre-game barrage rolling and disrupting the Germans their ability to deploy efficiently was hampered. 

In cover of the heavy barrage the Soviet commander was eager to rush the enemy positions and sent a squad forward from their forward left Jump off point to try and take an enemy Jump off point before the Fallschirmsjager had time to get their heads up.

The Soviets underestimated the elite Fallschirmsjager's ability however, and despite the barrage the Germans apperared in their positions and opened fire on the Soviets in the open. In a hail of bullets the Soviets were cut down almost to a man and the remaining men were shocked.

Having endured the barrage the Fallschirmsjager are more
than ready as the Soviets try to rush across the open.
Their assault blunted the Soviet had to try a better way to attack and deployed a squad in cover behind a log house by the road and later first one and then the other T34/85 tank rolled on to the scene.

With Germans on the table the tanks kept their distance and shelled the German positions in the forrest and by the hamlet. Before casualties mounted the Germans withdrew out of sight from the tanks. 

The Soviet tanks enter the field.
Things started to look better for the Soviets as their tanks slowly advanced to find angles on the hidden Germans forcing the latter even further back. The Soviet infantry still hesitated to rush the open ground though as a German sniper team had taken position on the battlefield. As the sniper’s position on the roof of one of the loghouses in the hamlet was yet to be discovered by the Soviets the sniper was safe from the tanks’ weapons.

The FJ Sniper team in place to harras the Soviets
as the latter try to advance.
With the men in position and their Platoon leader close by to direct the attack the Soviets siezed the initiative (getting a double phase) and launched their attack on the hamlet. One of the T34s broke through the hedge and two SMG armed tankrider groups followed.

The Soviet lauch yet another attack acoss the fields.


Almost there now! One last push.

The Soviet commander in cover as the lead elements
of the attack are at the farm. Almost...
As the Soviet infantry ran across the open ground they took shock from the sniper firing at them. Also, a panzerschreck fired from the hamlet but its missile bounced off the front of the Soviet tank. The attack lost some momentum but was still on. With the lead group closing in on the hamlet the third fallschirmsjager squad appeared and opened fire at close range on the Soviets. The lead tankrider group took casualties aswell as shock, fell back and as the turn ended (due to the use of a German Chain of commande die) they fled the battlefield. 

The Germans were ready and appeared just in front of the lead Soviet group
guns blazing. The Soviets broke and fell back across the field.  
With their force morale now running low the Soviet commander tried one last gamble and ordered the two T34s forward at full speed towards the objective. At the same time the remaining Soviet infantry squad pushed on up the hill to the log buildings. With two fallschirmsjager units in the hamlet the remaining Soviet infantry stayed out of sight - with handgrenades being threwn over the roof tops from both sides instead.

The two Soviet tanks closed on the objective. As one of them had to pass by the forrest the Germans got their panzerfausts ready. The first shot from close range againt the side armour of the T34 stopped the tank and the next ’faust caused it to explode.

"Wait. Wait. Now, fire!" The FJ are ready with panzersfausts as the Soviet tank thunder past...
...with devastating results.
The second T34 tank ran the gauntlet as the German infantry tried get good panzerfaust shots off. With the Soviet tank almost at the objective (lacking 1” of movement and with a Chain of command die waiting to end the turn…) another panzerfaust hit home blewing up the last of the tanks and thereby ending any hopes for the Soviets to achieve their objective. The Germans had won.

The two Soviet tanks in flames, one of them oh so close to
the objective, with the Germans in contol of the field.

Conclusion

Another great game of Chain of Command!

We are still developing our Chain of Command skills and this time we also tried out the Soviets for the first time. Not only that but this was also the first time we fielded an elite platoon (rolling an extra command die per phase). We discussed before the game that it would be fun to have the Soviet try to do the stereotyphical all out attack. As the Soviets learned the hard way elite troops like the Fallschirmsjager are quite potent and can’t be expected to cover in their positions from a barrage, not even the Soviet ”Wrath of the Gods” barrage could keep them down. So, in retrospect the initial attack under cover of the barrage was too much of a gamble and the Soviets struggled during the rest of game because of it. Sending a pair of scouts to try and catch the Jump off point would have been wiser. One thing that we really enjoy is that Chain of Command really gives a great feel of platoon combat of World War 2 and punishes bad tactics.

It proved quite a challenge for the Soviets to reach the objective. After the Germans withdrew behind the hamlet and the forrest the Soviet tanks would have to come up close to target them, thereby exposing them to the many panzerfausts that the fallschirmsjager possess. The Soviets - being quite resilient - tried a second desperate infantry assault instead but got beaten back by all those machine guns.

The elite status – and their six command dice – makes the fallschirmsjager a tough nut to crack. The Soviet’s lack of a second senior officer (like an adjutant) also made many Soviet rolls useless making the difference in actions even more accentuated. Granted, the Soviet had ALOT of support but failed to use it to its full advantage.

Despite this it was very close in the end with the Soviets throwing their mid game caution to the wind and driving full speed with the two tanks for the objective. Had the Soviets rolled 1” longer for movement the last tank would have reached the objective. With a full Chain of command dice ready and waiting they could have ended the turn, therby winning the game. But it was not to be. A great game none the less!

Wednesday, March 22, 2017

WW2 28mm Soviets in Snowsuits

Time for some winter themed forces for WW2, beginning with a group of Soviets in snowsuits.


They are 28mm Soviet Veteran Squad in Snowsuits from Warlord Games. Really nice miniatures. They hardly require any preparation and also got painted pretty quick as they are covered by their snowsuits.

The snowsuits are in a dirty and damp "white" that gives really strong flashbacks to doing national service in the Swedish armed forces... Those suits were simply never in a clean white. 😀

The snowsuits are painted using the following method.
1. Black undercoat.
2. Vallejo deck tan.
3. Army Painter soft tone ink.
4. Vallejo deck tan. First a thinner layer then a thicker one. 
5. Mix in some Vallejo ivory in the deck tan for highlights. 
6. Vallejo ivory on it's own.