Showing posts with label The Pikeman's Lament. Show all posts

Sunday, September 29, 2019

AAR: A Return to Rügenwald 1630 - a Thirty Years War Skirmish in 28mm

A battle report using the Pikeman's Lament ruleset, depicting a raid during the Thirty Years War


Introduction

The Thirty Years War had been raging on the European continent for already more than a decade when Gustavus Adolphus in 1630 landed in Northern Germany with an army, initially to take control over the German cities on the northern German coastline.


Gustaphus Adolphus landing in Germany 1630.
Reay's Regiment, a regiment under Scottish commander Donald Mackay, 1st Lord of Reay, joined the Swedish forces and was involved in taking the coastal cities of Stettin and Colberg. Like an earlier game, seen HERE, this game is set in between the taking of those two cities. During that time, in August 1630, six companies of Reay’s Regiment, was ordered to re-join the main body of the regiment at Stettin. En route, one of the boats foundered off the Pomeranian coast near Colberg, and nearly 200 men landed with only themselves, their "swords, pikes and some wet muskets". The Scots surprised the town of Rügenwald (today Darlowo in Poland) and obtained fresh powder, ammunition and other supplies. They held the town for nine weeks until Gustavus Adolphus sent Hepburn’s Scottish regiment to relieve them.

A print showing Scottish soldiers of the Thirty Years' War. 

Northern Germany by the Baltic Sea in 1630. Rügenwald is marked on the map.

In an earlier game of this setting the Scots clashed with Imperial troops outside Rügenwald. In this game, that we played quite some time ago, the Imperial forces have managed to contain the Scots to the city of Rügenwald. The Scots don't just sit and wait for Gustavus Adolphus to come and rescue them however, but try and make life as miserable as possible for the Imperials. This game sees the Scots sneak out of the city to raid one of the Imperial camps in a nearby settlement. 


Scenario

We played the game using The Pikeman's Lament ruleset. Its a great ruleset written by Daniel Mersey and Michael Leck, from Osprey Games. The scenario was the Beating Up Quarter scenario from the rules with the Scots attacking and the Imperial troops defending. The defender - apart from a small unit - start asleep in the buildings and must successfully activate to enter the table. The attacker set up a given distance from the buildings. To win the attacker must succeed in setting fire to four buildings and not lose half of his force.

The Forces


The Scottish attackers.


The Imperial defenders.


Set up and deployment


We played on a 4x4' table.
The attackers must set up outside 12" from the camp.
Most defenders start the scenario in the buildings.


The Game

The Scottish attackers initially had some trouble putting houses on fire. Also, the Scottish infantry struggled against the Imperial forces that quickly managed do get out from the buildings to defend their camp. The Scottish fortune changed however and some Scottish horsemen managed to put first one and then another building on fire before the Imperials could come and stop them. In the end, just as the attackers were taking some heavy casualties they managed to set a third and fourth building on fire, thereby achieving their objective and they returned to Rugenwald victorious.

Below is the game in pictures.


The Scot raiders attack...

...and the alarm sounds.

A small Imperial night guard is ridden down.
The Scottish horsemen initially fail to put a building on fire.

The defenders rally from their quarters and mount up as the Scots close in.

The Imperial troops fire as the Scot gallopers charge.

The Imperials quickly form lines to repel the attackers.

Push of pike as the Scotsmen charge in.

Taking heavy casualties some Scotsmen turn and flee.

Having cleared the first line of defenders the Scottish
horsemen manages to put some buildings on fire...

...before getting back into the fight again.

The battle swings back and forth as more units charge in.

The fourth fire breaks out!
The Scotsmen have achieved their
objective and can retreat to Rügenwald.

Wednesday, August 30, 2017

AAR: Rivalry at Rügenwald 1630 - a Thirty Years War skirmish in 28mm

A battle report using the Pikeman's Lament ruleset depicting a skirmish outside Rügenwald in 1630

Introduction

After a long summer and a quiet blog its time for an AAR from a while back.

We played a Thirty Years War game using the excellent Pikeman's Lament rules of Dan Mersey and Michael Leck.

During the Thirty Years War many Scotsmen served with the Swedish army. The war had been raging on the European continent for already more than a decade when Gustavus Adolphus in 1630 landed in Northern Germany with an army, initially to take control over the German cities on the northern German coastline. Reay's Regiment, a regiment under Scottish commander Donald Mackay, 1st Lord of Reay, joined the Swedish forces and was involved in taking the coastal cities of Stettin and Colberg.

Our game is set in between the taking of those two cities. During that time, in August 1630, six companies of Reay’s Regiment, was ordered to re-join the main body of the regiment at Stettin. En route, one of the boats foundered off the Pomeranian coast near Colberg, and nearly 200 men landed with only themselves, their ‘swords, pikes and some wet muskets’. The Scots surprised the town of Rügenwald and obtained fresh powder and ammunition. They held the town for nine weeks until Gustavus Adolphus sent Hepburn’s Scottish regiment to relieve them (for more information have a look here).

In our scenario an Imperial probing force is closing on Rügenwald and some men of the Reay's Regiment mount up to meet them. For this we used the Gå På-scenario from the Pikeman's Lament, a straightforward fight between two companies, with scores for routing or wiping out enemy groups.

The Opposing Forces

Scottish

6 Gallopers including Officer @ 4 pts
6 Gallopers @ 4 pts
6 Gallopers @ 4 pts
6 Gallopers @ 4 pts
12 Shot @ 4 pts
12 Shot @ 4 pts
12 Pike @ 4 pts

The Scotsmen from Reay's Regiment


Imperial

6 Trotters including Officer @ 4 pts
6 Trotters @ 4 pts
12 Shots @ 4 pts
12 Shots @ 4 pts
12 Shots @ 4 pts
12 Pike @ 4 pts
6 Dragoons @ 4 pts


The Imperial Attackers


The Game

The game begun with both sides advancing. It soon became clear that the Imperial side could find good defensive positions on their side, covering the open ground in the middle of the battlefield. Also, the Scottish infantry in the center had difficulties keeping up with its cavalry. It didn't help that the Scotsmen got a message from their commander back in Rügenwald calling a group of men from the field of battle (a Random Event: rolling a doubble '1' for Activation followed by a '6')! However, the same group of men came back just a turn later (rolling a dobble '6' for activation followed by a '6')! We laughed as the Scottish commander obviously couldn't make up his mind.

The Scottish cavalry heavy forces failed to get to grips with the Imperial forces and where instead steadily depleeted through Imperial musket fire. A group of Scottish Gallopers tried to turn the Imperial flank but failed to make true impact. When the Imperials, through yet another Random Event, got reinforcements on that very flank the fight was all but over.

Some poor Scottish cavalry deployment facing well placed Imperial infantry gave a hesitant Scottish advance and manouvering in the face of Imperial musketry. The end result being that the Scots of the Reay's Regiment had to retreat to Rügenwald, and wait for Gustav Adolphus to send troops to save the day.

The Scottish cavalry advances...

...as the infantry try to keep up in the field.

The Imperial line, with Trotters coming down the hill.

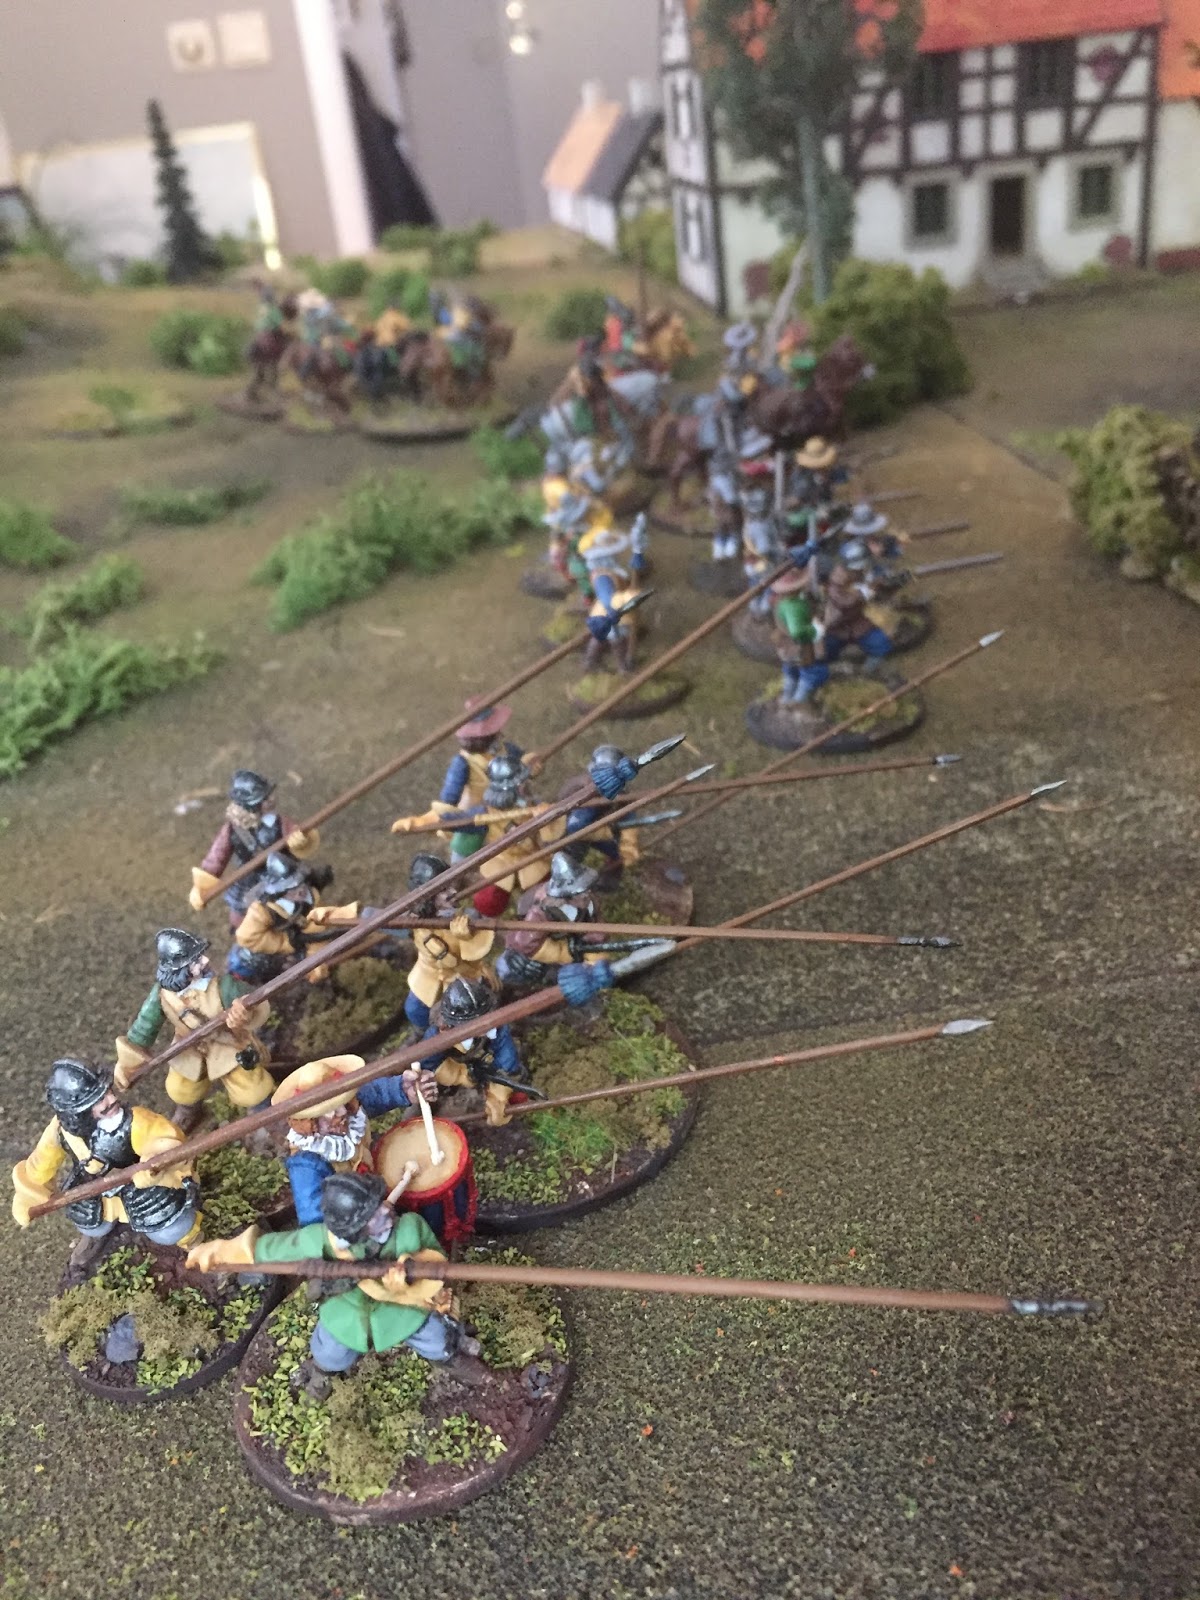
A close order group of Imperial pike - reinforced with Shot in good
positions -  making the Scottish cavalry hesitate.
With an overcrowded left flank met with fierce resistance
some of the Scottish cavalry try to find another way forward...

...but the Imperials pour fire into the Scottsmen trying to manouver in the field.


The Imperial line, well positioned.

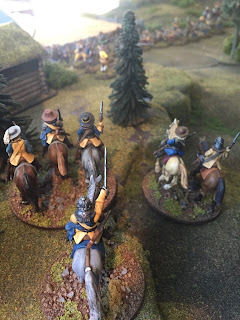
A group of Swedish cavalry - having entered the field of battle
through the hamlet - arrive to try to turn the Imperial flank

"Our commander needs us elsewhere! Lets go!"
The Scottish pike are called off the field of battle.
Only to return a turn later. :-)

Swedish cavalry on the extreme left flank.


The Scottish cavalry finaly attacks...

...crushing into Imperial Shot.
A swirling cavarly clash in the center.

Having beaten back the Imperial Trotters at a very high cost, the
lone surviving horseman of the flanking Swedish Gallopers
is in turn attacked by Imperial reinforcements. Game over.


Saturday, January 21, 2017

The Pikeman's Lament - an Early Copy of the New Rules from Osprey

An Early Look at the New Pike and Shot Wargaming Rules from Osprey

Its here! Well almost.
Having played a few testgames as the rules were developed I was very happy to recieve an early copy of the soon to be released The Pikeman's Lament ruleset from Osprey, written by Daniel Mersey and Michael Leck. Daniel is well known for the successful medieval wargaming rules Lion Rampant and Michael is a very inspiring blogger over at his Dalauppror blog and - for anyone who had the luck to be invited for a gaming session - a great gaming host with alot of great scenarios and an excellent grasp of game mechanics and what works for a balanced and entertaining game. That, and a deep knowledge of the pike and shot period.

I'd though I'd give a glimpse and somewhat simplified view of what they are about. The Pikeman's Lament are intended for the pike and shot period The Thirty Year's War, the English Civil War and the Great Northern War and beyond. The rules are divided into four main sections: Raising your company, Battle rules, Missions and Sample companies.

Raising Your Company
In the first section you create your officer and chose his men. As a guideline each side can select a force of 24 points. This is no strict rule however and less or more points works fine. Units are normally composed of six or twelve miniatures. As six men of real quality (like six Elite Gallopers or a small Veteran Storming party of six men) costs 6 points you can get away with as few as two dozens of miniatures a side (or even less if you play a smaller game). On the other hand, close to useless clubmen will only cost you 1 point for twelve men... With the cost being 4 points for six standard cavalry or twelve standard infantry its easy to understand that you have great freedom in composing your force to what suits your collection, scenario and/or historical context.

And what about basing? The ever present question. :-) The rules are very flexible in that regard. Measuring is done between the closest model in each unit and facing isn't an issue so it doesn't matter really how you base your models or what scale you use. Single based, four or six men based together or Dalauppror's 1-2-3 basing all work fine. Its in my view mostly a matter of helping keep track of casualties and if the unit is below half strength or not.

Samples of basing. Anything goes really.
Battle Rules
The Pikeman's Lament takes its core mechanics from the Lion (and Dragon) Rampant rules. You roll for activating one unit after another, ordering it to Attack, Move or Shot - or for some troop types special activations like Caracole or Skirmish. Each troop type is differentiated so that its easier to get them to do what they are trained to do. If you fail an activation before all your units are activated its your opponent's turn to begin activating his troops. This causes some fog of war and demands tactical thinking and making priorities. One modification that I really enjoy is that activation is a touch easier to succeed with in The Pikeman's Lament than in the earlier Lion Rampant. A simple move activation is often passed on 5+ on two dice, with a further +1 on the roll if your Officer is close enough. Still, Attacking and Shooting are for most troops a bit more complex activations. In my view this somewhat easier activation over all gives a smoother game but still keeps the possibility of a failed activation at a very wrong moment. The mechanics for shooting and close combat is fast and simple but takes matters of troop quality, cover and other things into effect. And there are simple yet effective Morale rules in there as well.

Missions
The rules are primarily intended to portray small scale warfare. That is raids, ambushes and escort missions. The rules presents ten different such scenarios with victory conditions, special rules etc. One is a straightforward fight and others are more complex. All to give a varied game. 

Sample Companies
In order to give examples on how to compose historical selections of troops and what can be portrayed by using different troop types.  

 
An example of the many photographs and paintings in the rules.

And Beyond?
What I really like about the rules are the freedom it provides. It has a very solid game mechanic at its core that provides great games. And naturally it works very well for say a Thirty Year's War foraging raid or an escort mission during the Great Northern Wars. But it also works fine for other scenes. Like conquistadors in the Americas in the 16th century with the rules for "Clansmen" to represent Inca warriors for example. It could also be used to represent warfare in late feudal Japan. Also it is possible to "scale up" to larger engagements with say a four man base "counting as" one man in the rules, i e that a 12 man unit by the rules is represented by 48 miniatures on the table. Maybe then with the addition of a rule on facing and flanks/rear.

I'd happily recommend them as I think they are a great set of rules.